 Click Setup on the Copy Utility main screen.
|
The Copy Utility is designed to run once per day, when you turn on your computer. You can run it manually as well. To configure what files you wish to copy, and other preferences, use the options listed below.
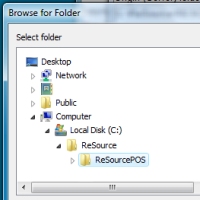
Origin (Server) Folder Path: This tells you the location of the files you're copying. Double click in the field to display a file browser:
Destination (Local) Folder Path: This tells you where the backup file is being stored.
|
|
|
Destination Folder Options: The path and name of a file to compress all copied files into. Compression happens immediately after the copy process has finished. Double-click the field to browse for a file. The compressed file is created fresh each time the copy process finishes. Note the compressed file is compatible with both PKZip and WinZip.
|
|
|
Other Folders To Copy: While it is rare to need to copy the contents of entire folder, the Copy Utility does have this option. These folders will be copied into the destination with their full folder path names. Sub-folders are not specifically included to save space. If there are additional sub-folders to copy, include them in this list.
|
|
|
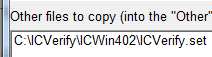
Other Files To Copy: This option allows you to designate other files from programs other than ReSource Partner.
|
|
|
Seconds To Wait: This sets the time between when the Copy Utility opens, and when the copy process begins to run. Default is 15 seconds.
|
|
|
Destination Compression File: After the Copy Utility finishes duplicating your files, it can then create a second compressed file set to be written to whatever location you choose (see some options below). This field requires the path and name of the file to be created.
Suggested default is C:\Poscopy.zip
|
|
|
Compress To Destination Folder: In addition to the other backups configured on this screen, checking this box will make a second, compressed, backup set to the c:\program files\POSCopy directory. Not commonly used. |
|
|
Options For Users with USB connected devices
If you wish to make a backup to an external device such as a USB connected drive (also known as a jump drive, keychain drive, etc)
For instance, if Windows assigns the drive the letter G, then what you would enter would be G:\poscopy.zip
|
|
|
Options For Users With DVR-W or CDR-W
Relying primarily on a backup program solely utilizing CDR-W or DVR-W is not recommended. Please contact ReSource Customer Service for more information.
|
|
![]() SEE ALSO: Copy Utility Setup On Client Machines
SEE ALSO: Copy Utility Setup On Client Machines
![]()
 ReSource Help System - Home Page
![]() Sales: (800)818-0492
Sales: (800)818-0492
New POS Hardware/Printers/Systems
ReSource/PC Synergy Software Support: (800) 485-6901 - Option 1
ReSource Partner Help System. ©ReSource Inc. All rights reserved.
ReSource Inc., Denver, CO 80112
Terms Of Use | Legal | About
ReSource Partner, Partner Express, QuickMail, and WebAssist are trade names of ReSource, Inc.
All other trade names mentioned are property of their respective owners.
POS SHP MBX | | US
15.0.1 | 15.0.1